728x90
반응형
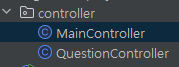
1. Springboot 디렉토리
2. 요약
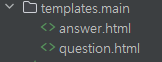
- MainController에서 main/question HTML파일을 웹 페이지에 get 방식으로 열어준다.
- http://localhost:8080/main/question 페이지에서 질문을 입력 받는다.
- get 방식으로 form에 담아 http://localhost:8080/main/ask?question=질문내용 페이지를 호출한다.
- QuestionController에서 질문을 JSON 형태로 파싱한다.
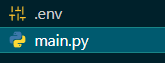
- 파이썬에서 Flask를 사용해서 5000번 포트에 서버를 열어두고 url로 오는 post 요청을 대기한다.
- ResponseEntity<String> response = restTemplate.postForEntity(url, entity, String.class); 로 파이썬 Flask 서버에 Post요청을 하고 response에 값을 전달 받는다.
- JSON으로 전달받은 response의 값을 풀어 문자열로 변환하여 "answer" 변수에 addAttribute한다.
- answer.html에서 <p th:text="${answer}"></p> 타임리프 문을 사용해 answer 변수를 받아 웹페이지에 보여준다.
3. 코드
#main.py 파이썬 파일
from flask import Flask, request, jsonify
from dotenv import load_dotenv
load_dotenv()
from openai import OpenAI

app = Flask(__name__)

def get_response(question):
    client = OpenAI()
    response = client.chat.completions.create(
        model="gpt-3.5-turbo",
        messages=[{"role": "user", "content": question}],
        temperature=0.7 #창의성을 얼마나 발휘하는가?
    )
    return response.choices[0].message.content

@app.route('/get-answer', methods=['POST'])
def answer():
    data = request.get_json()  # JSON 데이터를 파싱
    question = data['question']
    answer = get_response(question)
    return jsonify({"answer": answer})

if __name__ == '__main__':
    app.run(debug=True)
#.env 파일, 파이썬 파일과 같은 경로에 넣어주세요.
OPENAI_API_KEY=본인이 발급받은 API키를 넣어주세요.//MainController
@Controller
@RequestMapping("/main")
public class MainController {
@GetMapping("/question")
public String question(Model model) {
return "main/question"; // Thymeleaf를 사용하여 resources/templates/main/question.html을 렌더링
}
}//QuestrionController
@Controller
@RequestMapping("/main")
public class QuestionController {
@GetMapping("/ask")
public String askGpt(Model model, @RequestParam String question) {
RestTemplate restTemplate = new RestTemplate();
String url = "http://localhost:5000/get-answer";
// JSON으로 데이터를 보내고 받기 위한 설정
HttpHeaders headers = new HttpHeaders();
headers.setContentType(MediaType.APPLICATION_JSON);
JSONObject requestJson = new JSONObject();
requestJson.put("question", question);
HttpEntity<String> entity = new HttpEntity<>(requestJson.toString(), headers);
ResponseEntity<String> response = restTemplate.postForEntity(url, entity, String.class);
// JSON 문자열로부터 JSONObject 생성
JSONObject jsonResponse = new JSONObject(response.getBody());
String answer = jsonResponse.getString("answer"); // 'answer' 키로부터 값을 가져옴
model.addAttribute("answer", answer);
return "main/answer"; // Thymeleaf 템플릿 렌더링
}
}<!--answer.html-->
<!DOCTYPE html>
<html xmlns:th="http://www.thymeleaf.org">
<head>
<title>GPT Answer</title>
</head>
<body>
<h1>Answer from GPT:</h1>
<p th:text="${answer}">Default Answer</p>
</body>
</html><!--question.html-->
<!DOCTYPE html>
<html lang="en">
<head>
<title>Ask a Question</title>
</head>
<body>
<form action="/main/ask" method="get" target="_self">
<label for="question">Your Question:</label>
<input type="text" id="question" name="question">
<button type="submit">Ask GPT!</button>
</form>
</body>
</html>
'프로젝트 > Springboot_MariaDB' 카테고리의 다른 글
| [AWS] 아마존 웹 서비스에 스프링부트를 웹 호스팅 하는 방법 (0) | 2024.06.26 |
|---|---|
| AWS(Amazon Web Services)란? (0) | 2024.06.24 |
| [Springboot_MariaDB_thymleaf] 웹페이지에서 이미지 업로드, DB에 저장, 이미지 다운로드 (0) | 2024.06.13 |
| [Springboot_ajax] 웹 알람 서비스 구현 (0) | 2024.05.28 |
| [Springboot] 웹 브라우저에 음악 파일 재생하기 (0) | 2024.05.28 |

댓글